How to Register Your Firm on Apple Maps
Justine Young
Senior Content Writer
Search
Subscribe
Looking for a totally free, easy way to put your firm’s name in front of the millions of Apple users across the globe?
The answer lies in Apple Maps – a free navigation application that’s automatically installed in every Apple-made mobile device.
And just like we showed you how to register your firm on Google Maps, we’re now bringing you the quick and easy guide on how to register your firm on Apple Maps.
Why Should Advisors Care About Apple Maps?
Registering your firm on Apple Maps makes it easier for prospects and clients to find you – especially those that are local to your city or traveling through your neighborhood. It’s free, only takes a few minutes to complete and boosts your local SEO.
An Apple Maps listing also allows you to display other information about your firm (aside from your address). You can customize the listing to show your hours, a message from your staff, photos of your office and more.
Plus, you can track your listing metrics through your account and see which Apple Maps searches led to your listing being viewed. It’s a win-win for you and clients or prospects looking to find your services!
How to Register Your Firm on Apple Maps
Whether you’re a tech whiz or an internet novice, these five steps make it easy to register your firm on Apple Maps.
1. Go to Apple Business Connect and click “Get Started”
Apple Business Connect (previously known as Apple Maps Connect) is the website you’ll be using to register your firm’s location and services.

Once there, click “Get Started”. You’ll then be prompted to log in with your Apple ID.
Note: If you don’t have an Apple ID, you’ll need to create one (it’s free). You can do so by clicking “Create yours now” on the sign in page. After your account is created, you can continue following the below steps.

2. Search for your firm’s address and click “Add New Place”
After agreeing to the terms of service, you’ll see a page asking you to add your firm’s location. Simply type in your firm’s address. If a listing for your firm already exists, it will show up in the results.
Note: A listing may already exist for your firm if Apple found and pulled data from the internet to create one. If not, you’ll just create a new one. This won’t affect the process except for the verification method – if your firm listing already exists, you can verify the address at this point with a quick phone call. Once verified, you’ll be able to add information like your hours, photos of your office, etc. from your account page (see Step Five below).
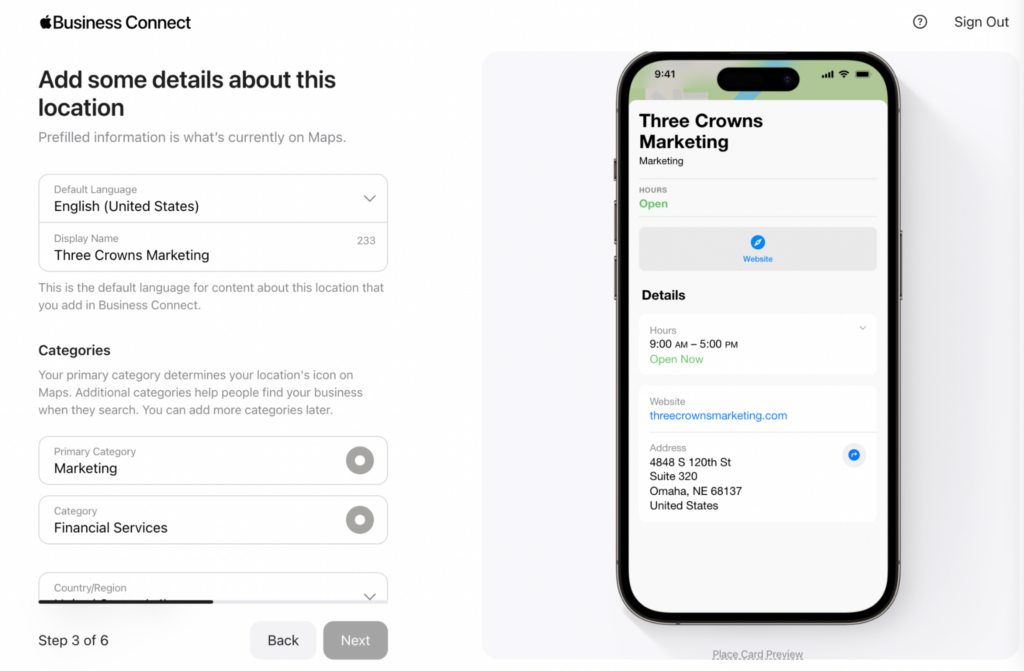
3. Follow the prompts to enter your firm’s information
At this point, the Apple Business Connect will guide you through more questions about your firm, including your business category and website URL.

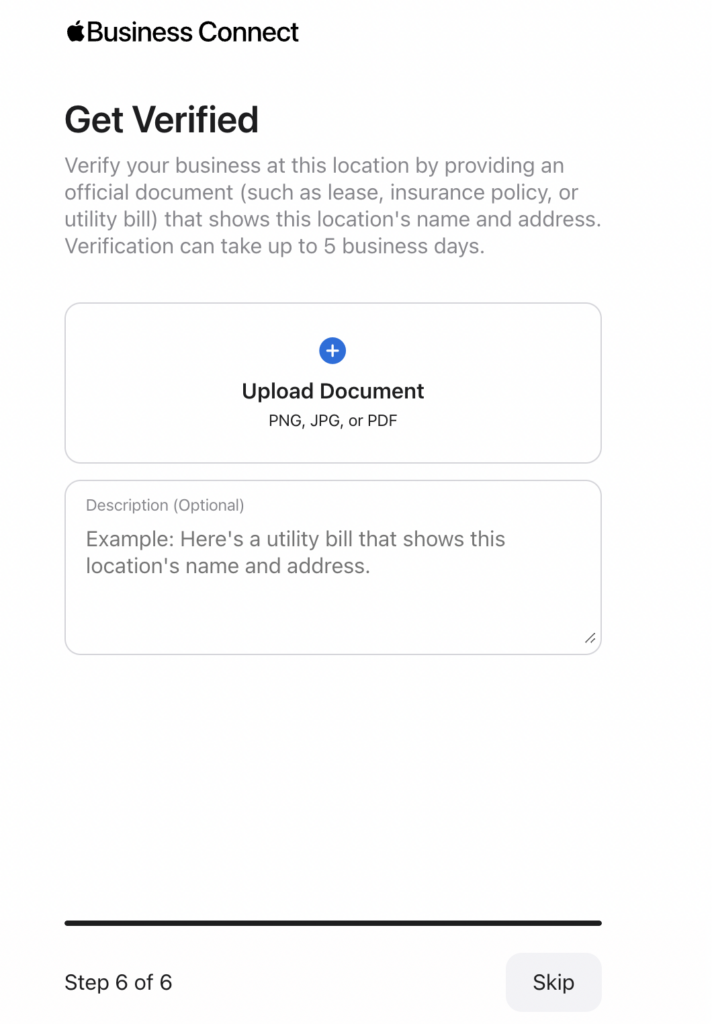
4. Get verified
If you haven’t already, you’ll need to verify your firm’s authenticity at this point, which you can do by submitting documents with your firm’s name and address present. Apple will then review your documents and verify your firm within five days.

5. Add more information
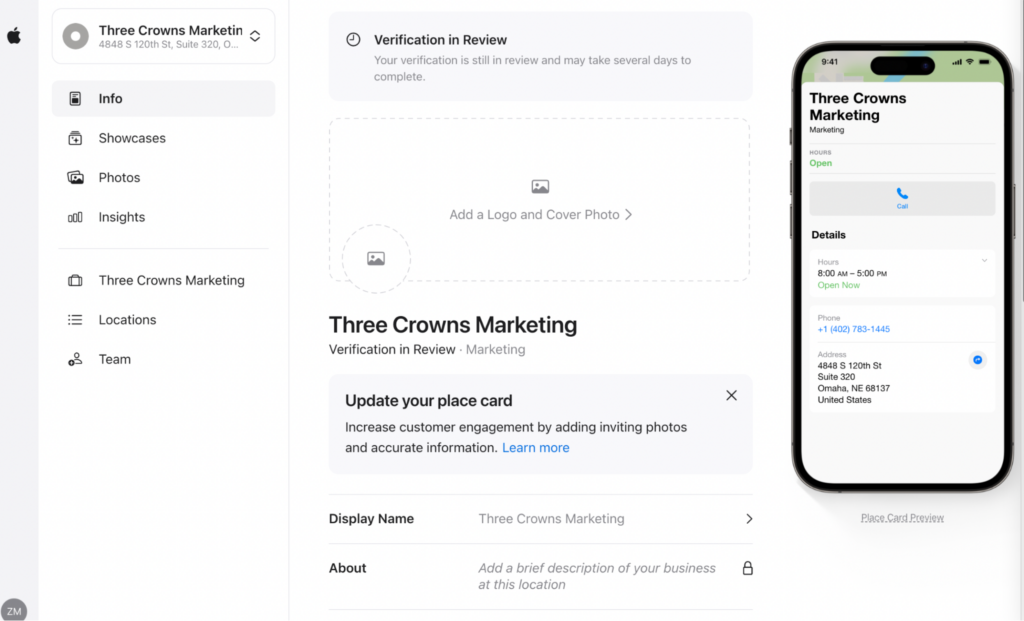
Now that your firm is officially listed, you can fill out more information for Apple Maps users. Your Apple Business Connect page should look something like this:

Here, you can add your hours, information about your firm, photos of your office and more. You can also track insights about your firm, like which searches led to the most views. Take some time to explore your listing and update it as you wish.
Note: Some of these features will be available immediately while others will only become accessible once your firm is officially verified by Apple.
And that’s it! Now you’re officially listed on Apple Maps and discoverable by local prospects and clients.
Learn More with Three Crowns
We’re here to help spread the word about your firm’s business. Get in touch today to learn more about our full-service marketing packages or to chat with a member of our team – we can’t wait to hear from you!